
1.1 How to Use SurtitleLive: Quick Start Guide
Set up your account, upload a DOCX script, review translations, rehearse cues, and deploy your first show to projection screens and audience phones.
⚡ Quick Guide
Time: Varies by script length and queue state | Difficulty: Beginner
Goal: Create account → create project → upload → analyze → editor → deploy
Start: surtitlelive.com → Sign Up
Finish: Viewer link, QR code, and operator link ready for rehearsal or showtime
Get Your First Show Ready for Live Delivery
This is the shortest safe path through the current product. Use it once, then open the deeper guides only where you need them.
Phase 1: Account and project
Step 1 – Create Account
- Open
Sign Up. - Review and accept the Terms of Service and Privacy Policy.
- Complete the form and verify your email.
Step 2 – Create Project
- On the Projects Dashboard, click the dashed
New Projectcard. - Enter the name, optional description, and status.
- Click
Createin the dialog footer.
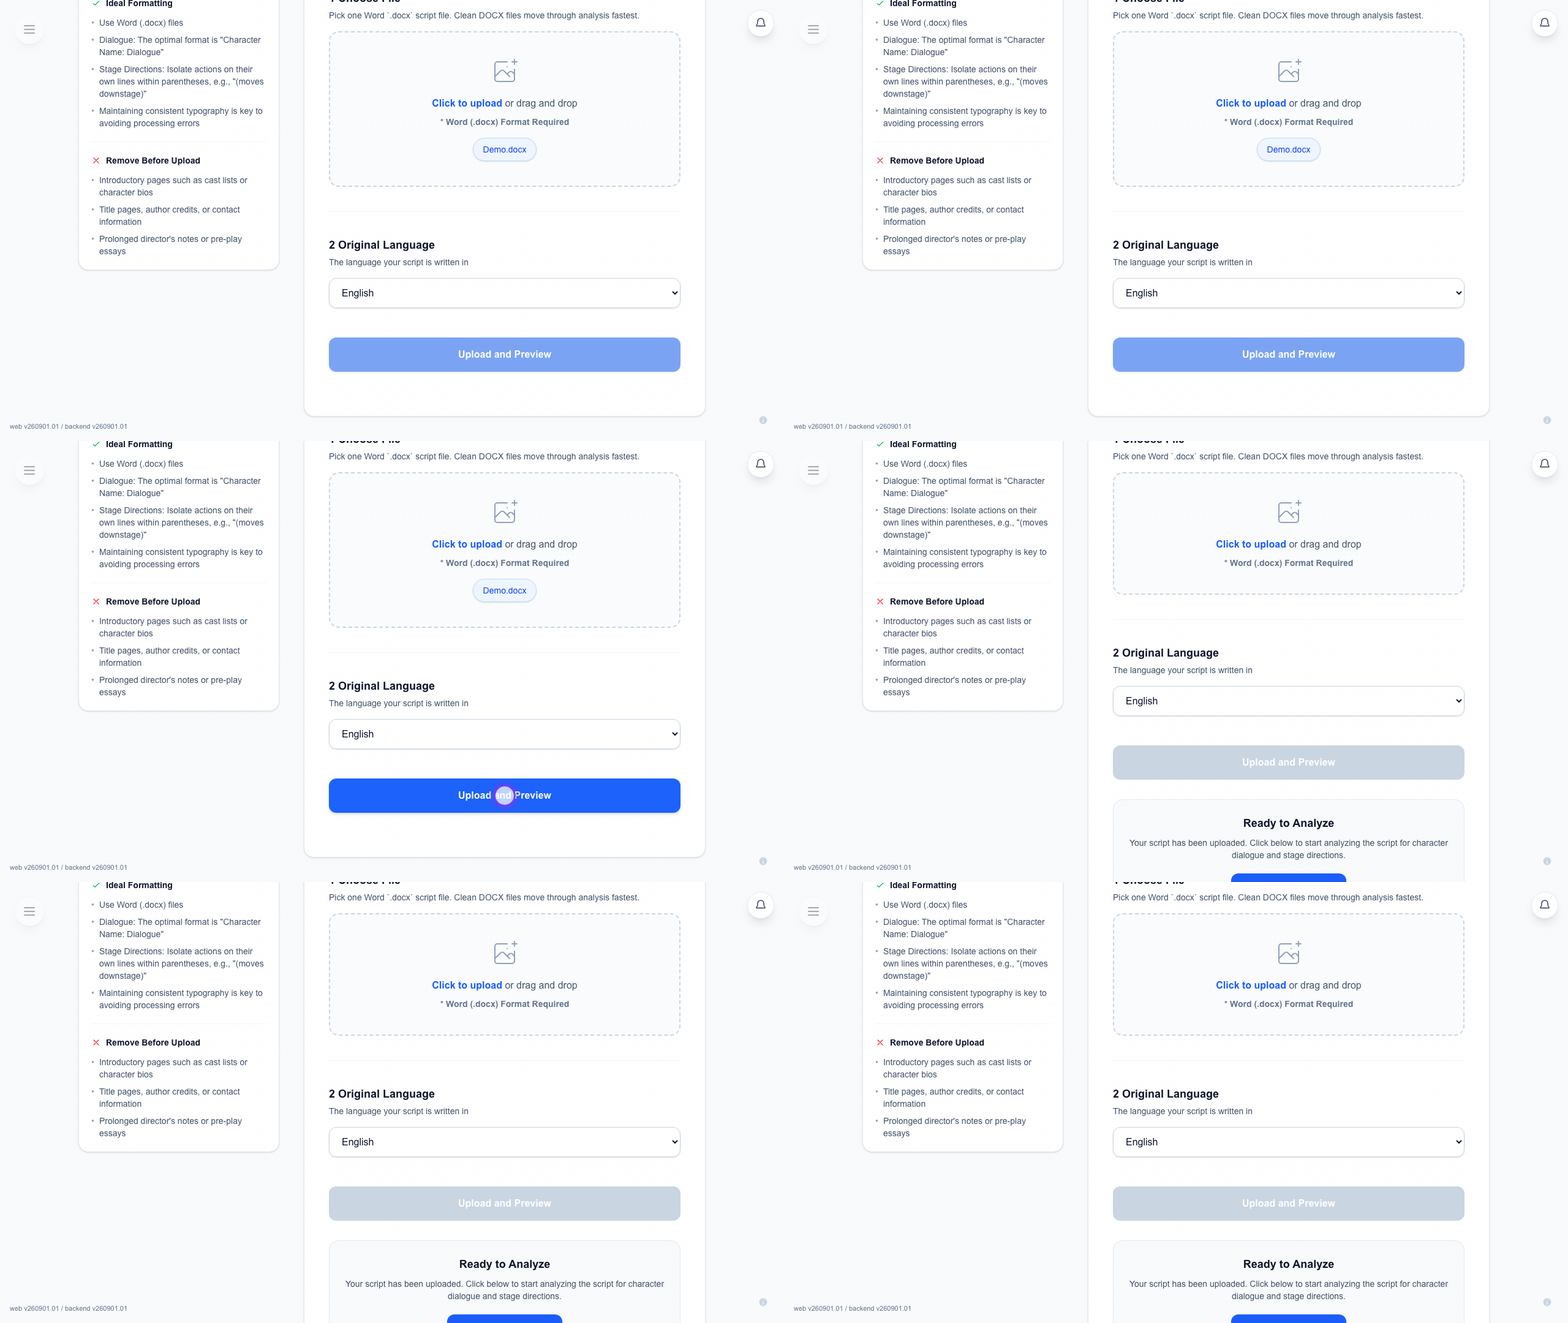
Step 3 – Upload Script
- Open the project.
- Use
Upload Scriptand choose a Word .docx file. - Confirm the original language.
- Use
Upload and Preview.
Phase 2: Analyze and prepare
Step 4 – Open the Editor
- After upload, open the analysis step.
- Run
Run Preview Check. - If the preview looks right, click
Start Analysis. - When analysis finishes, continue to
Editor & Simulation.
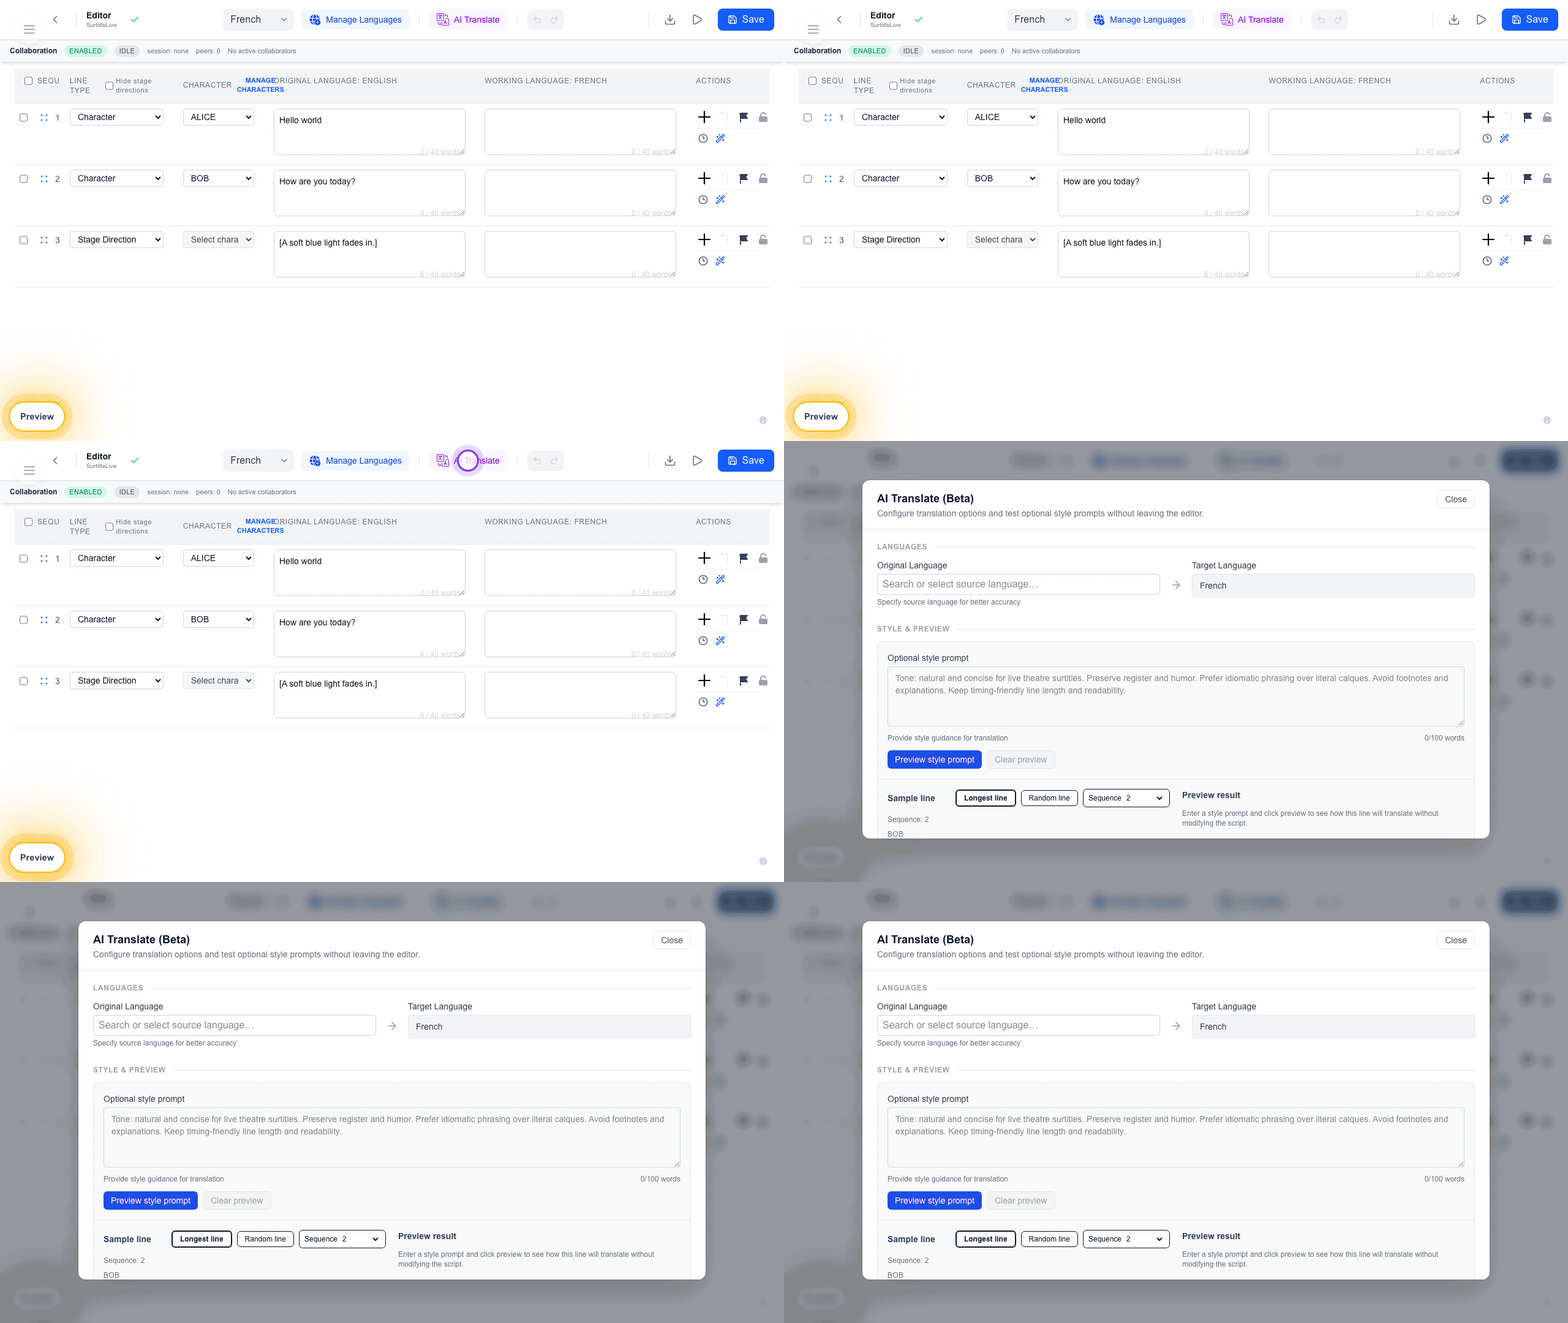
Step 5 – Add Languages
- In the editor toolbar, click
Manage Languages. It is the blue button near the center. - Add the languages you want enabled for this project.
- Use
Languagejust left ofManage Languages.
Step 6 – Translate if needed
- Click
AI Translateonly after your languages are enabled. It is the purple button just right ofManage Languages. - Choose source and target languages.
- Review the estimate and warnings.
- In the translation dialog footer, click
Confirm and start.
Phase 3: Simulate and deploy
Step 7 – Simulation Mode
- In the top toolbar right area, click
Open Simulation. This button uses a right-pointing play triangle icon. - Review the prepared project languages, screen setup, and sequence.
- Use this step to catch layout or cue issues before deployment.
Step 8 – Finalize & Deploy
- In Simulation, use
Looks Good! Finalize and Pushat the bottom-right. This is the large red-outline finalize button. - Choose the live languages. The source language is included, and your plan controls how many translated languages can go live.
- Configure deployment settings:
- Region – Lite uses system-selected regional placement; Pro and Pro+ can choose US, EU, or Asia
- Duration (Visible Window) – Lite uses the default 7-day visible window; Pro and Pro+ can choose longer visible windows within the deployment UI.
- Operator Login – Set the Operator Password used to unlock the operator link
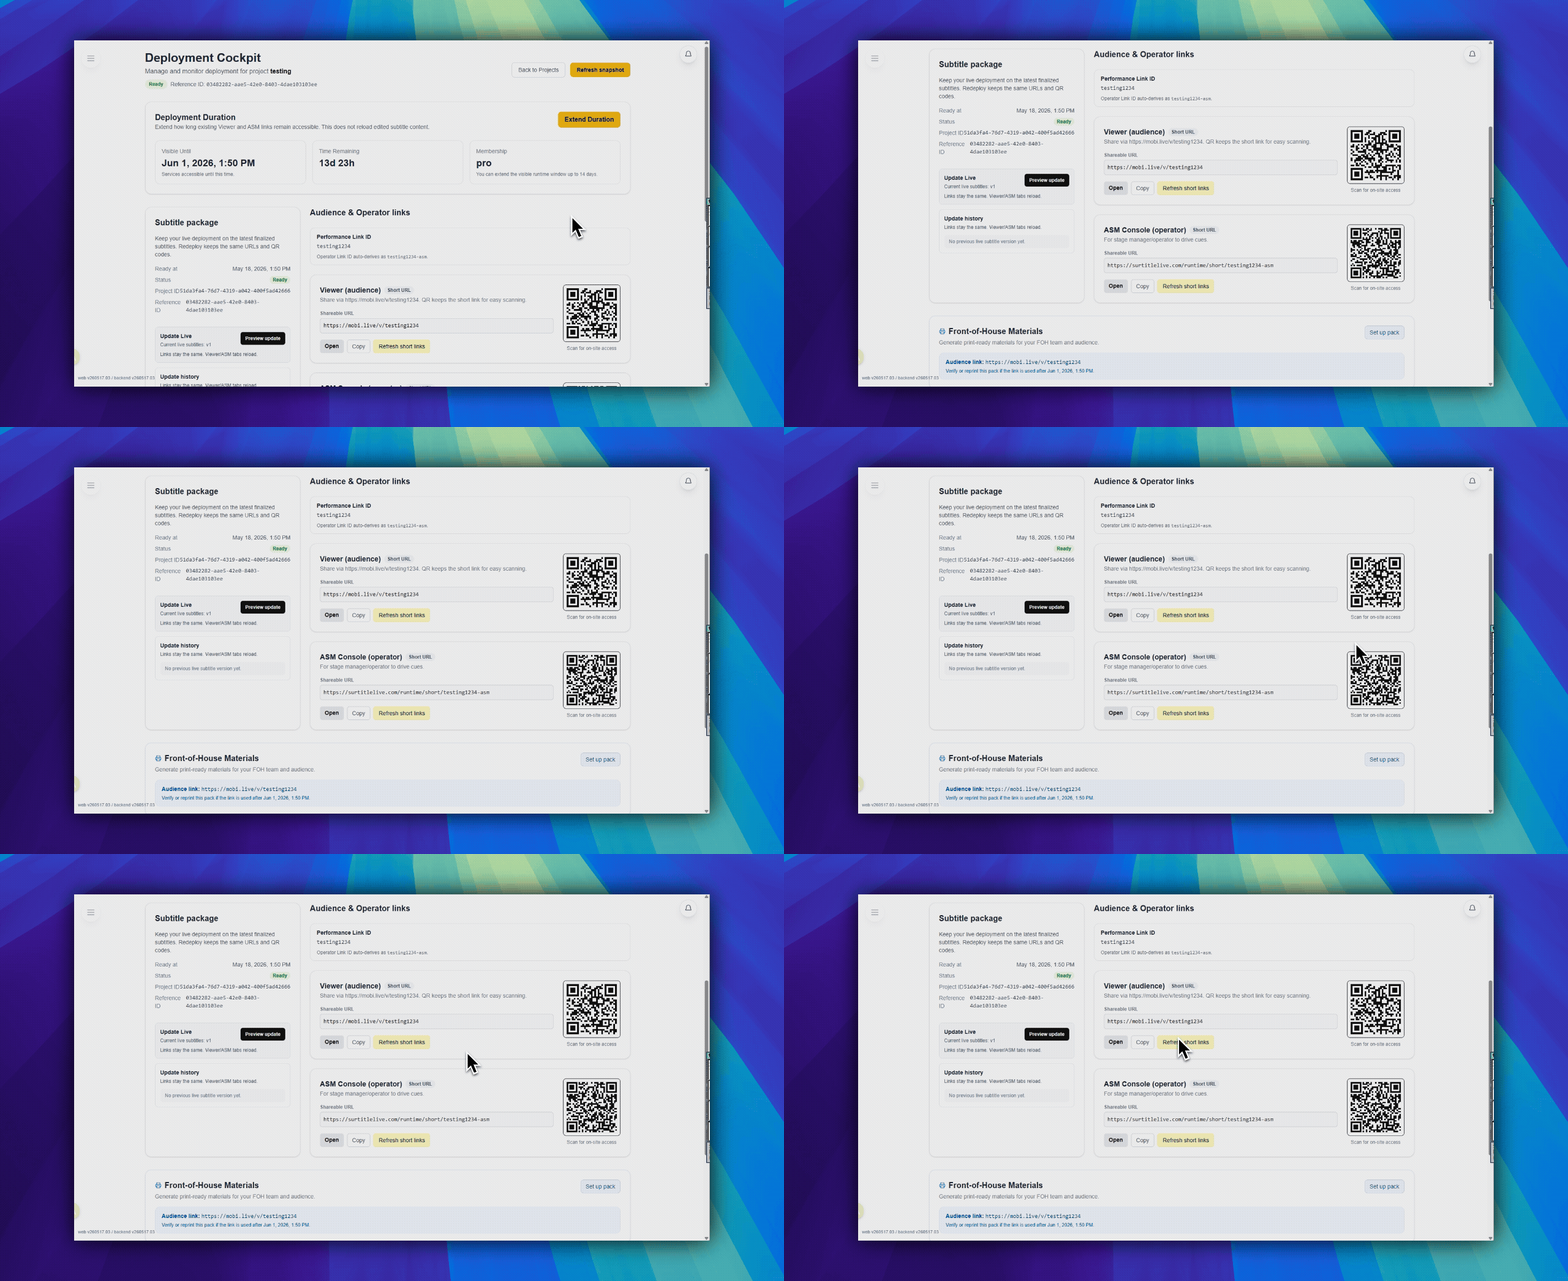
- On the Go Live form, click
Go Liveat the bottom of the form. It is the main blue submit button with a paper-plane icon. - Watch the deployment status until the Viewer and Operator links are ready
Step 9 – Go Live
- Copy the
Viewer Linkor export theQR Code. - Open the
Operator Link. - Keep rehearsal and backup steps in place before you start the live show.
Quick Reference: Editor Toolbar
| Button/Control | Location | Purpose |
|---|---|---|
Language dropdown | Top toolbar, center-left | Select which language column to edit |
Manage Languages | Top toolbar, center | Add or remove translation languages |
AI Translate (purple) | Top toolbar, center-right | Auto-translate using AI |
Download | Top toolbar, right | Export to Excel or PowerPoint |
Open Simulation | Top toolbar, right | Open Simulation with the play-triangle button |
Save | Top toolbar, far right | Save all changes |
What's Next?
- During Show: Use the Operator Link to control cues – see ASM Quick Reference
- Apply saved edits: Save in Editor, then use
Update Livein the top-right editor toolbar orUpdate Live Subtitlesin Deployment Cockpit. ASM only controls live cues. - Team: Invite members to collaborate on scripts
- Backup: Export your script before major changes
- Terminology: New to terms like cue, deployment, or operator password? See the Glossary
Need Help?
- Browse detailed guides in each section below
- Contact support: info [at] surtitlelive [dot] com
FAQ
Common questions for this workflow, based on the current SurtitleLive system.
How do I start using SurtitleLive for a live show?+
Start by creating an account, uploading a script, running analysis, checking the script in the editor and Simulation, then deploying the show and sharing the Viewer Link.
Why can't I go live on the Free plan?+
Free accounts cannot run a production live deployment. Eligible verified workspace owners and managers can use the limited Free deployment preview for the first 30 cues, for 60 minutes, up to twice per day. Lite, Pro, or Pro+ is required for production delivery.
Onboarding Workflow
Continue In This Workflow
Account setup, sign-in recovery, first project steps, and invitation acceptance for new users.
0.1 Creating Your Account
Register, verify your email, and understand the required profile details.
0.2 How to Verify Your Email
Verify your email address, understand the verification screen, and know what to do if the email does not arrive.
0.3 How to Reset Your Password in SurtitleLive
Reset your password after clicking the email link and understand how the shared sign-in action page works.